
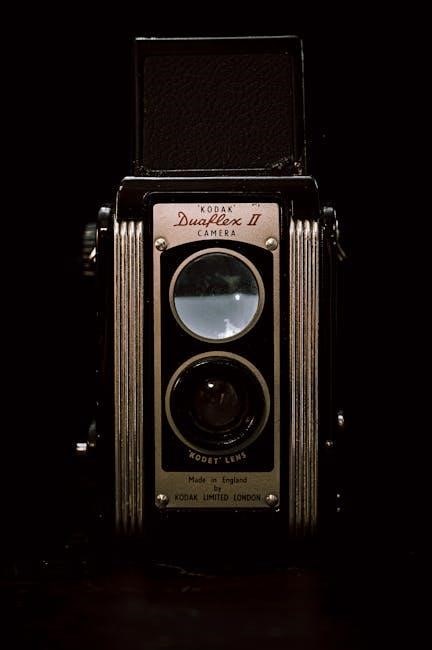
XDVD179BT Manual: Comprehensive Guide
This comprehensive guide details the installation, operation, and troubleshooting of the Dual XDVD179BT multimedia receiver, featuring a 7-inch touchscreen and Bluetooth connectivity.
Welcome to the Dual XDVD179BT multimedia receiver! This unit combines a DVD player, Bluetooth connectivity, and a vibrant 7-inch touchscreen display for an enhanced in-car entertainment experience. This manual provides detailed instructions for installation, setup, and operation.
Before beginning, please carefully review the safety precautions and warnings outlined within this guide. Familiarize yourself with the unit’s features and functionalities to maximize its potential. Refer to the troubleshooting section if you encounter any issues, and don’t hesitate to contact Dual customer support for assistance.

Key Features and Specifications
The XDVD179BT boasts a 7-inch touchscreen display, Bluetooth for wireless audio streaming and hands-free calling, and compatibility with smartphones. It supports DVD playback of various formats, enhancing your travel entertainment. The unit also features AM/FM radio with RDS capabilities.
Key specifications include Bluetooth version, supported audio/video codecs, and display resolution. Detailed technical specifications, including power output and impedance, are available in the dedicated section of this manual for comprehensive understanding.
Unboxing and Package Contents
Upon opening the XDVD179BT package, carefully inspect all components. You should find the main unit itself, a remote control (with batteries included), a wiring harness for power and audio connections, and mounting hardware for secure installation.
Additionally, the package contains an owner’s manual for detailed instructions and troubleshooting. Verify that all listed items are present; if anything is missing or damaged, immediately contact Dual customer support for assistance and replacement options.
Installation Guide
Proper installation of the XDVD179BT requires careful attention to detail. Begin by disconnecting the vehicle’s negative battery terminal to prevent electrical shorts. Consult the included wiring diagram to correctly connect the power, ground, speaker, and antenna wires.
Ensure all connections are secure and insulated. Proceed with physically mounting the unit into the dashboard opening, utilizing the provided brackets and hardware. Reconnect the battery to finalize the installation process.
Wiring Diagram and Connections
The XDVD179BT utilizes a color-coded wiring harness for simplified installation. The red wire signifies constant 12V power, yellow activates ignition power, and black is ground. Speaker connections follow a standard configuration: front left/right, rear left/right, and subwoofer output.
An antenna input accepts the vehicle’s antenna signal. Refer to the detailed wiring schematic in the appendix for precise pin assignments and connection points. Secure all connections with appropriate connectors for optimal performance.
Mounting the Unit
Securely mounting the XDVD179BT is crucial for safe operation. Utilize the provided mounting brackets and screws, ensuring a snug fit within the vehicle’s dashboard opening. Verify sufficient clearance behind the unit for wiring and connectors.
Avoid obstructing ventilation openings. Double-check the unit’s stability after installation, preventing movement during vehicle operation. Proper mounting minimizes vibration and potential damage to the internal components. Consult a professional installer if unsure about the process.

Bluetooth Pairing and Functionality
The XDVD179BT offers seamless Bluetooth connectivity for hands-free calling and audio streaming. To pair, enable Bluetooth on your smartphone and search for “XDVD179BT” in the device list. Confirm the pairing request on both devices.
Once connected, you can enjoy wireless audio playback and utilize the unit’s built-in microphone for calls. Bluetooth functionality allows convenient access to your music library and phone features while driving, enhancing safety and convenience.
Connecting Smartphones and Devices
Establishing a connection with your smartphone is straightforward. First, ensure Bluetooth is activated on both your phone and the XDVD179BT unit. Search for “XDVD179BT” within your phone’s Bluetooth settings and select it to initiate pairing.
You may be prompted to enter a PIN; typically, this is “0000”. Confirm the connection on both devices. Once paired, the unit will remember your device for future automatic connections, simplifying the process for convenient access.
Bluetooth Audio Streaming
Enjoy wireless audio playback from your smartphone or other Bluetooth-enabled devices. After successful pairing, select the Bluetooth audio source on the XDVD179BT. Your device’s music library will then be accessible through the unit’s interface.
Control playback – including volume, track selection, and pausing – directly from the head unit or your connected device. Ensure a stable Bluetooth connection for uninterrupted audio streaming and optimal listening pleasure during your travels.
Touch Screen Display Overview
The XDVD179BT boasts a responsive 7-inch touchscreen, serving as the central hub for all functions. This intuitive interface provides access to radio, Bluetooth, DVD player controls, and navigation app integration.
Icons are clearly labeled for easy identification, and a simple tap is all it takes to select desired features. Familiarize yourself with the layout to quickly navigate menus and customize settings for a personalized in-car entertainment experience.
Navigating the User Interface
The XDVD179BT’s user interface is designed for simplicity. Main menu options – Radio, Bluetooth, DVD, Navigation – are prominently displayed. Utilize the touchscreen to select your desired function.
Within each section, further options are accessible via clearly labeled icons. Touching these icons provides instant access to specific features. The system supports swiping gestures for menu navigation. Refer to the complete manual on Dual’s website for detailed explanations of each screen and function.
Customizing Display Settings
The XDVD179BT allows for extensive display customization. Access the settings menu through the main interface to adjust brightness, contrast, and color saturation. Users can select from pre-set display modes or create custom profiles.
Wallpaper options are also available, allowing personalization of the home screen. Adjusting the clock display and screen timeout settings enhances usability. A slight adjustment of these controls may save you a service call, as detailed in the owner’s manual.

Radio Functionality
The XDVD179BT boasts robust radio capabilities, supporting AM/FM frequencies. Tuning can be performed manually or via auto-scan for available stations. Preset stations allow quick access to favorites, enhancing the listening experience.
The unit also features RDS (Radio Data System) functionality, displaying station names and program information when available. Refer to the complete manual on www.dualav for detailed instructions on utilizing these features effectively.
Tuning and Presetting Stations
The XDVD179BT offers both manual and automatic tuning options for radio stations. Manual tuning allows precise frequency selection, while auto-scan quickly locates available stations. Once found, stations can be easily preset for instant recall.
To preset a station, simply tune to the desired frequency and press and hold a preset button. This feature streamlines access to frequently listened-to stations, improving the overall user experience.
RDS (Radio Data System) Features
The XDVD179BT supports RDS (Radio Data System) functionality, enhancing the radio listening experience. RDS displays station names, song titles, and other relevant information broadcast by compatible stations. This feature provides listeners with more context about the content they are enjoying.

RDS also offers features like automatic frequency switching to the strongest signal of a station and program service identification, improving reception and usability.
DVD Player Operation
The XDVD179BT features a built-in DVD player, offering versatile entertainment options. This unit supports various disc formats, providing access to a wide range of movies and content. Ensure discs are clean and properly inserted for optimal playback. The DVD video display will function within the in-dash unit.
Should playback issues arise, consult the troubleshooting section of this manual before seeking service. Proper disc handling is crucial for reliable operation.
Supported Disc Formats
The XDVD179BT DVD player is designed to be compatible with a broad spectrum of disc formats, enhancing your in-car entertainment experience. Supported formats generally include DVD-Video, DVD-R, DVD-RW, CD, CD-R, and CD-RW discs. However, compatibility with DVD+R and DVD+RW formats may vary.
Please note that the unit’s performance with recorded discs depends on the recording quality and finalization process. Always ensure discs are clean and free of scratches for optimal playback.
Troubleshooting DVD Playback Issues
If experiencing issues with DVD playback on your XDVD179BT, several solutions can be attempted. First, ensure the disc is inserted correctly and is clean, free of scratches. If “No Disc” appears, try another disc to rule out a disc issue. For frozen playback, attempt to eject and re-insert the disc.
If problems persist, consult the owner’s manual for further troubleshooting steps, or contact Dual customer support for assistance. A slight adjustment of controls may resolve the issue.
Navigation App Integration
The XDVD179BT facilitates seamless integration with smartphone navigation applications, offering convenient turn-by-turn directions. Utilizing Bluetooth connectivity, users can mirror their smartphone’s display onto the unit’s 7-inch touchscreen. This allows for easy access to favorite navigation apps without needing a separate dedicated system.
Refer to the complete manual on Dual’s website (www.dualav.com) for detailed instructions on compatible apps and setup procedures. Instant access to navigation is just a touch away!
Smartphone App Compatibility
The XDVD179BT is designed to work with a variety of smartphone applications, enhancing the in-car entertainment and navigation experience. While specific compatibility may vary, the unit generally supports mirroring apps through a Bluetooth connection. This allows users to display and control compatible apps directly on the unit’s touchscreen.
For a comprehensive list of tested and supported applications, and detailed setup instructions, please consult the complete owner’s manual available on the Dual website (www.dualav.com).
Using Navigation Features
The XDVD179BT integrates with smartphone navigation apps, projecting map displays and providing turn-by-turn directions on the unit’s 7-inch touchscreen. To utilize these features, ensure a compatible app is running on your connected smartphone. The touchscreen interface allows for basic control of the navigation app, offering a safer driving experience.
Refer to the complete manual on www.dualav.com for detailed instructions on app mirroring and navigation feature operation, including troubleshooting tips.
Troubleshooting Common Issues
Encountering problems with your XDVD179BT? Before contacting support, consult the troubleshooting section within the owner’s manual; Common issues include power failures or audio malfunctions. A slight adjustment of custom controls may resolve minor problems independently. If the unit won’t power on, verify all wiring connections are secure.
For more complex issues, or if you suspect a PCB component failure, professional repair may be necessary. Always check the manual first!
No Power/Unit Won’t Turn On
If your XDVD179BT fails to power on, begin by verifying the unit is receiving power. Check the main power wire connection – ensure it’s securely connected to both the unit and the vehicle’s power source. Inspect the fuse associated with the unit; a blown fuse is a common cause.
Confirm the vehicle’s ignition is in the accessory or on position. If issues persist, consult the wiring diagram in the manual for accurate connections.
Audio Problems and Solutions
Experiencing audio issues with your XDVD179BT? First, verify the volume is appropriately adjusted and not muted. Check speaker connections to ensure they are secure and correctly wired. Confirm the correct audio source is selected – Bluetooth, radio, or DVD.
A slight adjustment of custom controls may resolve the issue. If problems continue, consult the manual’s troubleshooting section before contacting customer service for assistance.
Customer Service and Support

Need assistance with your XDVD179BT? Dual provides comprehensive customer support to address any questions or concerns. Before contacting support, review the troubleshooting guide within this manual for common solutions.
For further help, reach out to Dual support directly. Warranty information is also available, detailing coverage and procedures for potential repairs or replacements. Dedicated support ensures a positive user experience with your multimedia receiver.
Contacting Dual Support
For direct assistance, reach out to Dual’s customer service team. While specific contact details aren’t explicitly provided in the available resources, checking the official Dual website (www.dualav.com) is recommended.
You’ll likely find options for phone support, email inquiries, or a live chat feature. Before contacting them, have your XDVD179BT model number and purchase date ready. This will expedite the support process and ensure efficient resolution of your issue.
Warranty Information
Detailed warranty information for the XDVD179BT is typically included with the product packaging or available on the official Dual website (www.dualav.com). The warranty covers defects in materials and workmanship under normal use.
The duration of the warranty period varies, so carefully review the documentation. Keep your proof of purchase safe, as it’s required for any warranty claims. Modifications or misuse may void the warranty, so adhere to the guidelines provided.
Safety Precautions and Warnings
Prioritize safety during installation and operation of the XDVD179BT. Avoid operating the unit while driving; focus on the road. Disconnect the vehicle’s power before wiring to prevent electrical shock.
Do not expose the unit to excessive moisture or extreme temperatures. Ensure proper ventilation to prevent overheating. If you notice smoke or unusual odors, immediately turn off the unit and disconnect power. Refer to the full manual for detailed safety guidelines.
Technical Specifications Detailed
The Dual XDVD179BT boasts a 7-inch TFT LCD touchscreen display with a resolution of 800×480 pixels. It supports various video formats, including DVD, VCD, MP3, and JPEG. The unit features Bluetooth 4.0 for wireless audio streaming and hands-free calling.
Its amplifier delivers 4 x 45 watts of peak power; It includes AM/FM radio with preset memory and supports RDS functionality. Detailed specifications regarding input/output connections are available in the complete manual.
Firmware Updates and How To
Maintaining up-to-date firmware ensures optimal performance and compatibility for your XDVD179BT. Visit the official Dual website (www.dualav.com) to check for available updates. Download the latest firmware file to a USB drive.
Follow the on-screen prompts within the unit’s settings menu to initiate the update process. Ensure a stable power supply during the update to prevent data corruption. Refer to the complete manual for detailed step-by-step instructions and troubleshooting tips.
Appendix: Detailed Wiring Schematics

This appendix provides comprehensive wiring diagrams for the XDVD179BT multimedia receiver, essential for professional installation and troubleshooting. Diagrams illustrate connections for power, ground, speakers, antenna, and auxiliary inputs.
Carefully review these schematics before commencing any wiring work. Incorrect connections can damage the unit or vehicle electrical system. Refer to the installation manual for color-coding and pin assignments. Detailed schematics are also available online via the Dual support website.